
Microsoft Edge is one of the better web browsers developed by Microsoft. It comes in-built with Windows 10, and is set as the default web browser. While some folks may opt to switch to a different web browser, Chrome or Firefox for instance, with much each, many will decide to stick with Edge. And for good reasons too.
Unlike its predecessor, Microsoft’s Internet Explorer, users will find that Edge actually works more smoothly and faster compared to other contemporary web browsers. Also, it isn’t as heavy on the system, and is regularly updated along with the Windows 10 updates.
All this said, Microsoft Edge isn’t without its fair share of bugs and malfunctions. Although not common, the Edge user can expect to run across problems every once in a while. One such error that is being reported a lot recently is the black screen. Many Edge users have complained that their Edge tabs are turning into black screens.
As far as it is understood, this happens randomly without much provocation, and usually takes place when the user attempts to open new tab, or access the features panel on the right hand side (Hub Notes, options etc.). This usually forces Edge to restart.
Until Microsoft releases an official fix, there are a number of things the user can try in order to fix the problem of Edge tabs turning into black screen.
How to fix black screen issues on Microsoft Edge
Fix 1 : Restart the system to perform a clean boot
The first thing to try in order to try and resolve the black screen problem would be to perform a clean boot. There’s a good change that the black screen could be the result of an incompatible software, so a clean boot can help isolate the problem. Follow these steps:
- Press Windows + R to open up the Run dialogue,
- Type msconfig and hit Enter,
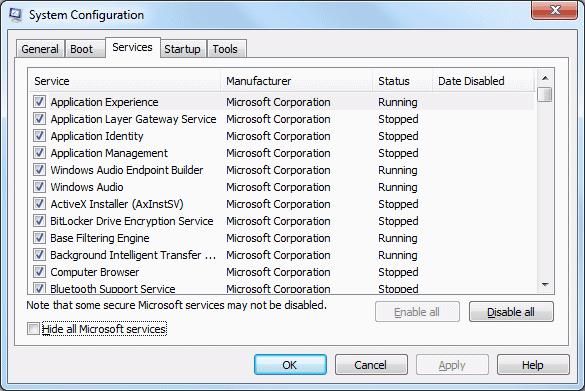
- Navigate to the Services tab and check on Hide All Microsoft Services,
- Select Disable all,
- Navigate to the Startup tab and select Task Manager,
- Right-click on each process and select Disable; disable all processes,
- Press Apply and OK,
- Restart the computer.
If the black screen problem was resolved, try enabling each application again, one at a time. The moment the black screen reappears, you will know that the application you most recently re-enabled is the source of your problem. Remove the program. You may try re-installing it.
Fix 2 : Update display drivers
Another easy fix could be updating the display driver. The black screens or other common Edge problems such as stuck tabs could be a result of outdated graphics/display drivers. To resolve this, follow these steps:
- Press Windows, and in the search box type Device Manager,
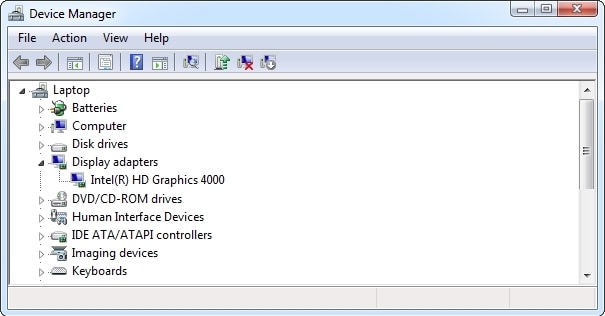
- Open Device Manager and find Display adapters,
- Expand Display adapters; you should see your display driver(s) listed there,
- Right-click on the display driver(s) and click on Update Driver Software,
- You will receive on-screen instructions on where to proceed from there on,
- Once the update has been installed, restart the computer.
Fix 3 : Check for malware & disable Plug-ins.
Another possibility could be the presence of an unwanted malware or virus in your system. This could be responsible for triggering the black screens and other problems on Edge. In order to resolve this problem, you should perform a full system scan in the anti-virus software of your choice. While you may use any anti-virus software you like, make sure it is up-to-date, or else it may not be able to detect some of the newer malwares. If your anti-virus software detects some malicious software, remove them immediately.
In case your anti-virus software was not able to detect any malicious software, you may want to check what plug-ins are installed on Edge and disable them. Follow these steps:
- On Edge, click on the three dots at the top right corner of the screen (More),
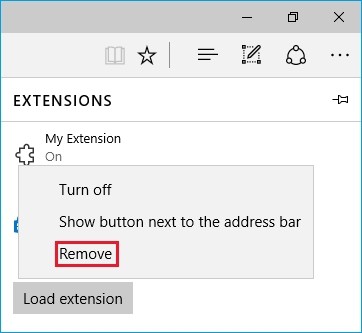
- Scroll down and click on Extensions,
- From the list of extensions, remove any extension that you don’t remember installing yourself,
- Also disable all extensions that you don’t use on a daily basis,
- Restart Edge.
Fix 4 : Reset Edge configurations via PowerShell
If all the above steps failed to fix the black screen problem on Edge, you may try and reset Edge altogether via PowerShell. It is wise to keep a System Restore Point before you proceed on with this, in case something goes wrong. To create a system restore point on Windows 10, follow these steps:
- Press Windows, and in the search box type System Restore,
- From the list of search results select Create a restore point,
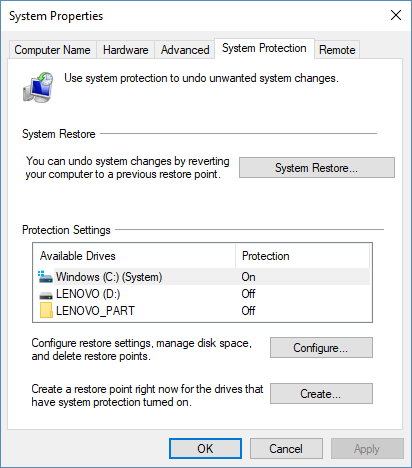
- System Properties should open up at this point,
- Navigate to the System Protection tab and click on Configure,
- Click on Turn on system protection, move the Max Usage slider to around 10%, and click OK,
- You will be returned to System Properties,
- Click on Create to create a system restore point.
Once you’re set, follow these steps to reset Edge via PowerShell:
- Navigate to C:Users*Your Username*AppDataLocalPackagesMicrosoft.MicrosoftEdge_8wekyb3d8bbw,
- Clear the contents of this file,
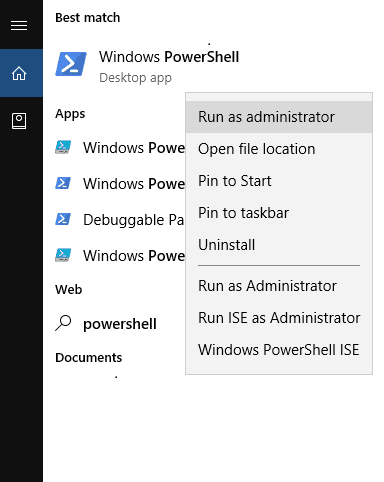
- Press Windows, and in the search box type PowerShell,
- Right-click on PowerShell and select Run as Administrator,
- On the powershell interface, copy and paste the following command and hit Enter:
- Get-AppXPackage -AllUsers -Name Microsoft.MicrosoftEdge | Foreach {Add-AppxPackage -DisableDevelopmentMode -Register “$($_.InstallLocation)AppXManifest.xml” -Verbose}
- If the process was successful, you should see a report printed out in yellow, ending with the following:
- C: WindowsSystem32>
- If the process failed, copy and paste the following command and hit Enter, and repeat step 5:
- Get-Appxlog | Out-GridView
- Once you’re through, Edge will have reset to its initial settings and the problem should no longer appear.
Or Contact Microsoft Support Phone Number +1-877-353-11479
Or Visit : Microsoft Support Team


