
Windows 10 is available in 32-bit (x86) and 64-bit (x64) architectures, and if your PC is using a 32-bit installation, you can upgrade to 64-bit as long as you have a capable processor and enough memory.
Although both architectures include the same set of features, the 64-bit version of Windows 10 unlocks support of up to 2TB of RAM, which overcomes the 4GB of RAM limitation found in the 32-bit variant.
This additional access to memory enables you to run more apps simultaneously, and it improves productivity with memory-intensive tasks, such as video editing, virtual machines, and web browsing when dealing with a lot of open tabs. In addition, you can run x64 as well as x86 applications, something that it's not possible on a 32-bit installation.
Unlike upgrading from Windows 10 Home to Pro, switching from 32-bit to 64-bit doesn't require to purchase a new license. However, there's not an in-place upgrade path to switch, which means that if you're planning to move to a different architecture, you must perform a clean installation of the OS.
In this Windows 10 guide, we'll walk you through the steps to upgrade from the 32-bit to the 64-bit version of the OS.
How to check if Windows 10 64-bit is compatible with your PC
You can only install the 64-bit version of Windows 10 on compatible hardware, which means that the first step to leaving 32-bit behind, you have to determine if your computer has a 64-bit processor and at least 2GB of RAM.
Checking 64-bit compatibility using Settings
To check if you have a compatible processor, you can use the Settings app with these steps:
- Open Settings.
- Click on System.
- Click on About.
- Under "Device specifications," check the System type details.

If it reads 32-bit operating system, x64-based processor, then your device is running a 32-bit version of Windows 10 on a 64-bit processor. If it reads 32-bit operating system, x86-based processor, then your device doesn't support the 64-bit version of Windows 10.
While in the "About" page, also check the Installed RAM details, and make sure that your device has at least 2GB of memory, as it's the minimum amount required to install the 64-bit version of the OS.
Checking additional CPU compatibility
While most newer devices are likely to meet the minimum requirements to run Windows 10, if you have a relatively old system, you also want to make sure that the processor includes these required features:
- Physical Address Extension (PAE).
- No-eXecute (NX).
- Streaming SIMD Extensions 2 (SSE2).
- CMPXCHG16b (CX16).
The installation wizard always checks for hardware compatibility, and it won't continue with the installation if the processor does not support these features. However, you can also check if the processor includes these features using Microsoft Sysinternals Coreinfo tool using these steps:
- Open the Microsoft Sysinternals website.
- Click the Download Coreinfo link.

- Right-click the Coreinfo.zip folder and select the Extract all option.
- Click the Extract button.

- In the File Explorer address bar, type cmd, and press Enter to open Command Prompt in the folder location.

- Type the following command and press Enter:
coreinfo- Use the Ctrl + F keyboard shortcut to open the find command, and look for these features:
- PAE.
- NX.
- SSE2.
- CX16.

After completing the steps, if all the features are present, then you can upgrade to Windows 10 64-bit.
Checking device driver compatibility
Additionally, you want to make sure that other components, such as video and sound cards are also 64-bit compatible as 32-bit drivers won't work.
If you have a device that is only a few years old, there's a good chance that there are drivers designed for the 64-bit version of Windows 10. However, it may not always be the case, as such before switching from 32-bit to 64-bit, make sure to check with your manufacturer support website to see if there are 64-bit drivers available for download.
How to upgrade from 32-bit to 64-bit version of Windows 10
Microsoft doesn't offer a direct path to switch architectures, but you can make the jump from 32-bit to 64-bit performing a clean installation of Windows 10.
Creating bootable media
To perform a clean installation of Windows 10, you'll need to use the Media Creation Tool to create a bootable media. Just insert a USB flash drive with at least 4GB of storage to your device, and follow these steps:
- 1. Open the official Download Windows 10 web page.
- 2. Under "Create Windows 10 installation media," click the Download tool now button.

- 3. Double-click the MediaCreationToolxxxx.exe file to launch the utility.
- 4. Click the Accept button to agree to the Microsoft terms.
- 5. Select the Create installation media (USB flash drive, DVD, or ISO file) for another PC option.
- 6. Click the Next button.

- 7. Select the correct language and edition of Windows 10, and choose the 64-bit (x64) option for "Architecture."

- 8. Click the Next button.
- 9. Select the USB flash drive option. (If you don't see the drive, click the Refresh drive list option.)

- 10. Click the Next button.
- 11. Select the removable drive you want to use from the list.

- 12. Click the Next button.
Once you've completed the steps, the wizard will download the required files, and it'll create the bootable media compatible with Windows 10 64-bit.
Installing Windows 10 from scratch
To do a clean install of Windows 10, restart your computer with the bootable media, and then follow these steps:
Warning: This is a friendly reminder that you'll be making significant changes to your current installation that can cause problems and data loss if you don't do it correctly. It's recommended to make a full backup of your PC before proceeding.
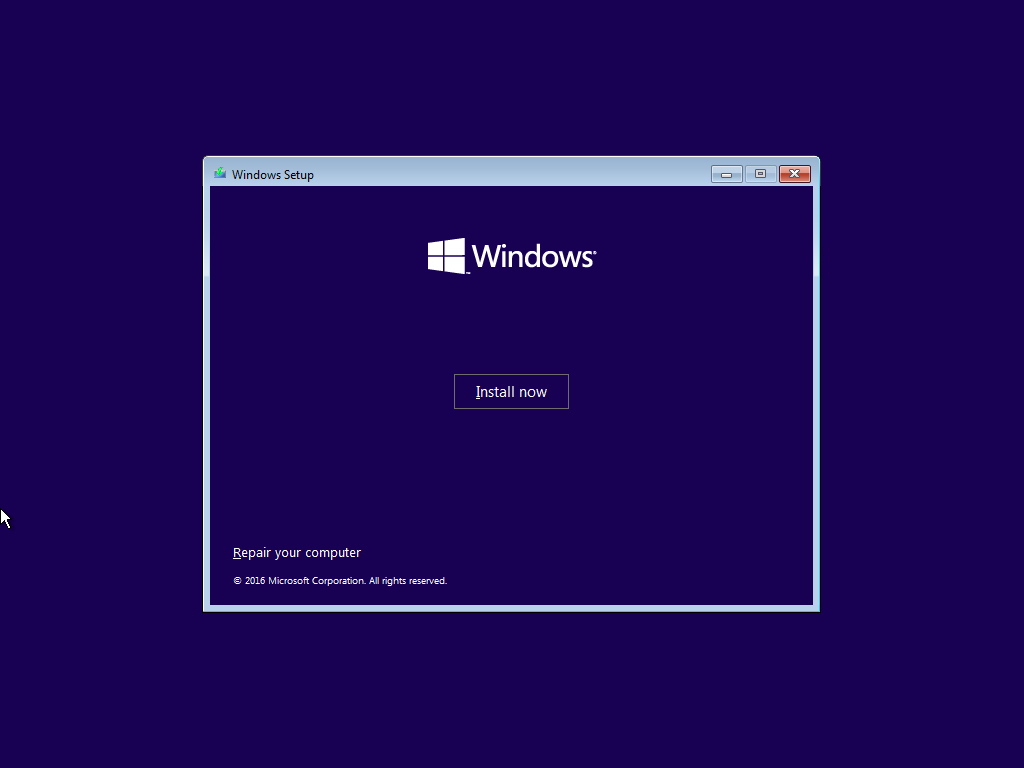
- On "Windows Setup," click the Next button.
- Click the Install Now button.
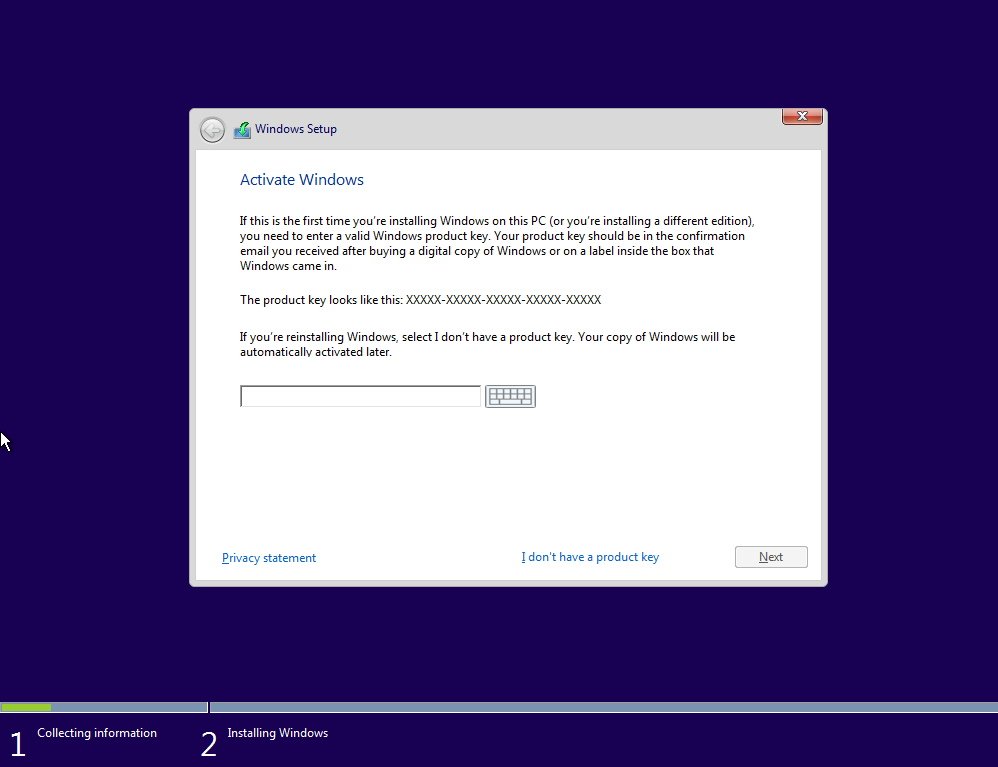
- If you're installing Windows 10 for the first time or upgrading a previous version, you must enter a genuine product key. However, if you're reinstalling Windows 10, you can click the I don't have a product key link to continue (assuming that your device was already properly activated).
- Click the Next button.
- Select the edition of Windows 10 (if applicable). This selection must match the edition your license activates.
- Click the Next button.
- Check the I accept the license terms to agree.
- Click the Next button.

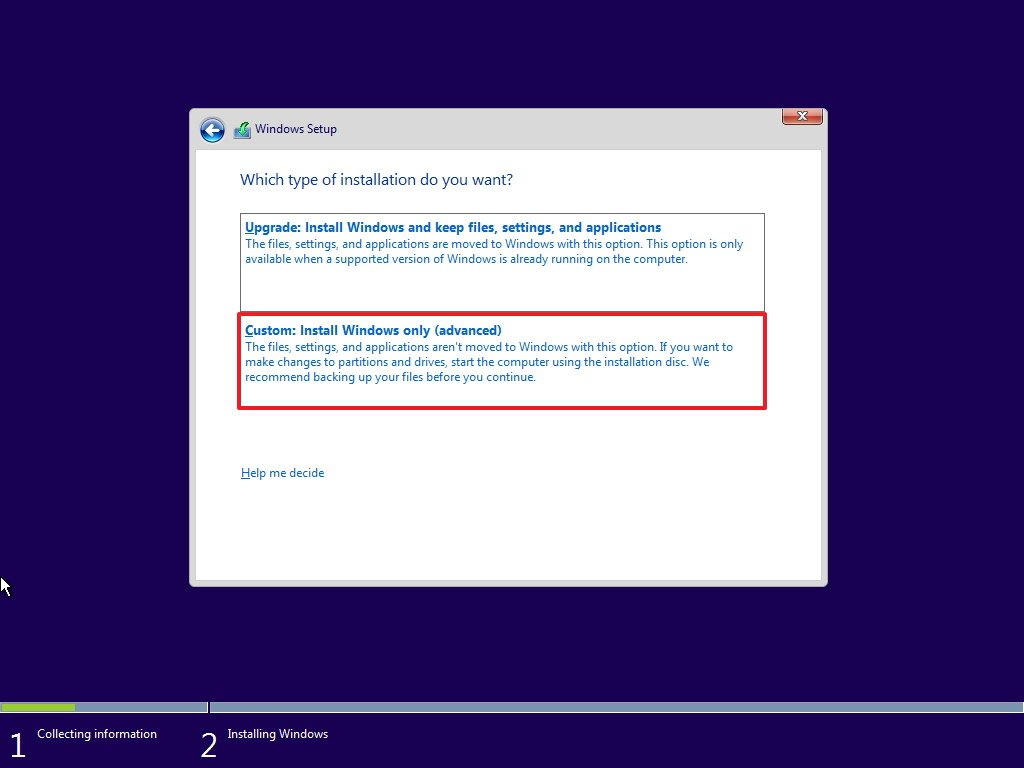
- Click on the Custom: Install Windows only (Advanced) option.
- Select the partition with the current installation of Windows (usually "Drive 0"), and click the Delete button to remove the partition from the hard drive.
Quick Tip: If you have multiple partitions, on the primary hard drive (Drive 0), you can select and delete each one of them. Windows 10 will recreate the required partitions automatically. However, you don't have to delete partitions on secondary drives.
- Select the empty drive (Drive 0 Unallocated Space).
- Click the Next button.

After completing the steps, the setup will install the 64-bit version of Windows 10 on your computer, and after several reboots, you'll need to continue with the on-screen directions to complete the Out-of-box experience (OOBE) setup the OS with your preferences.
Finally, make sure to go to Settings > Update & Security > Windows Update, and click the Check for updates button to download the latest security patches, drivers, and software updates.
If some of the device drivers are not available using Windows Update, you'll need to check your manufacturer support website to download and install the 64-bit version of the drivers. Also, don't forget to reinstall your applications and restore your files from backup.
No comments:
Post a Comment